
TeXstudio can be adapted in a wide range. Some options are directly available in the GUI via context menus, see here , others are available with the “Configure TeXstudio” command in the “Options” menu (“Preferences” under Mac OS X). Note that there are two levels of detail. More advanced or less often used options are only visible if you toggle “Show advanced options” in the lower left corner.
The side-panel and the log panel may be hidden with a control on the lower-left edge of the main window.
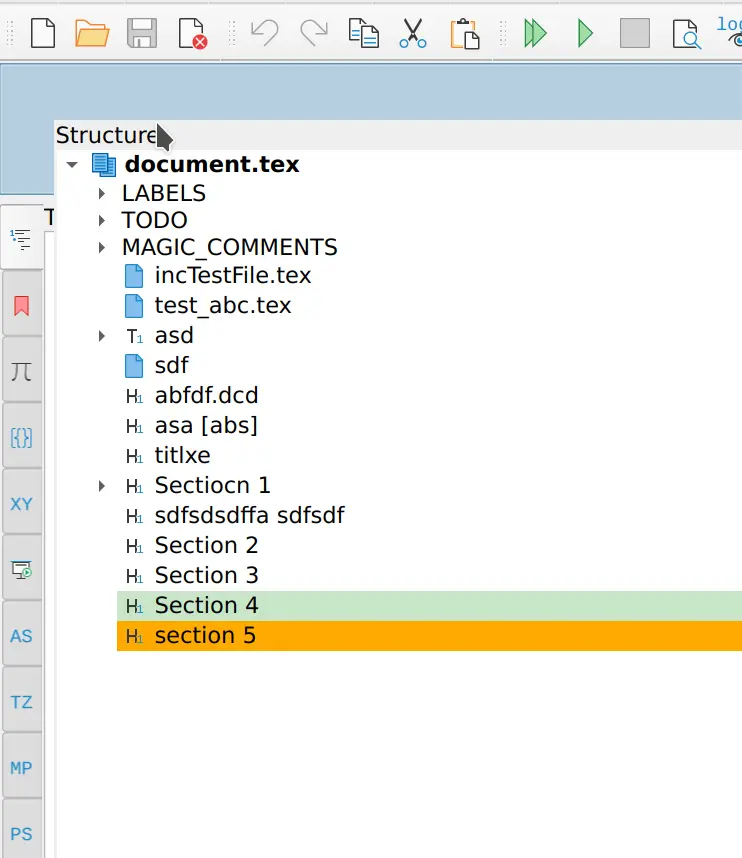
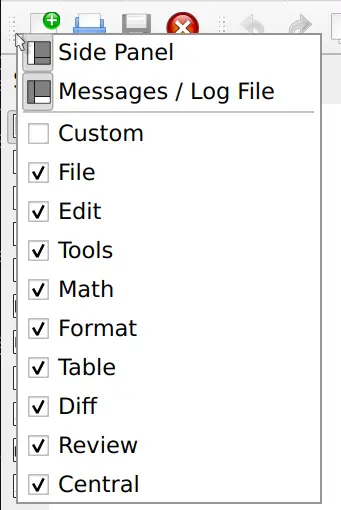
The sidepanel itself consists of different docks which can be reordered, split and even moved to the right hand side of the window.
Side-panel with all docks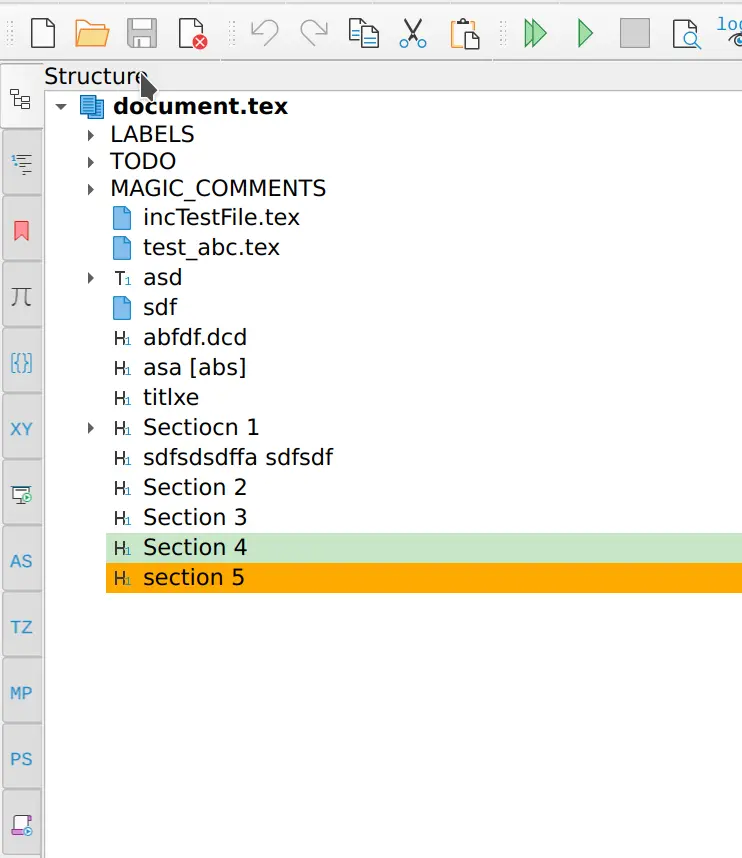
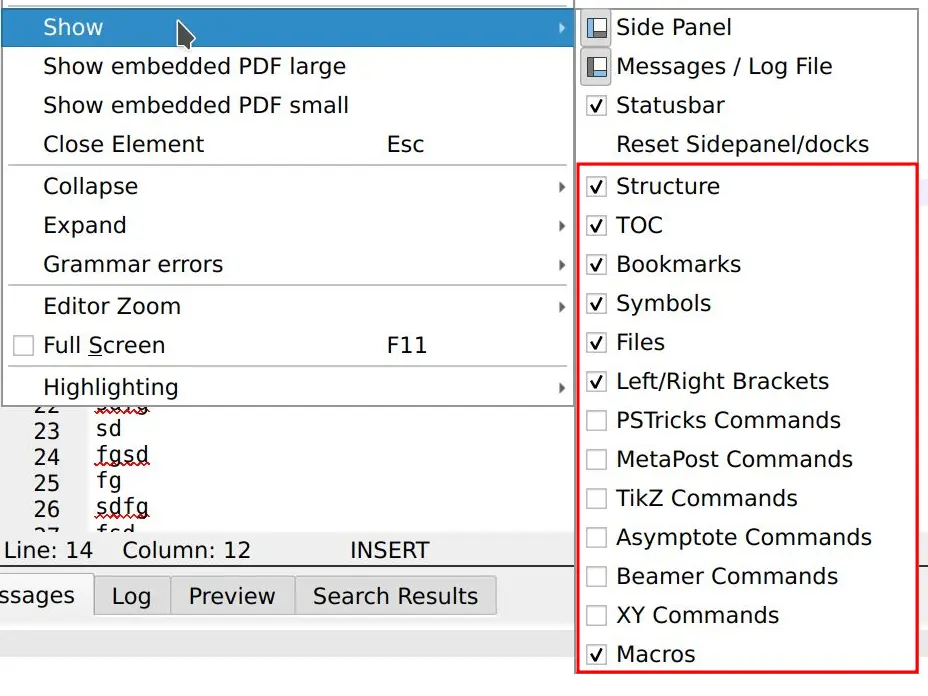
The side-panel set-up can be reset to default by using View/Show/”Reset Sidepanel/Docks”.
The menu “View/Show” also offers to show/hide docks.
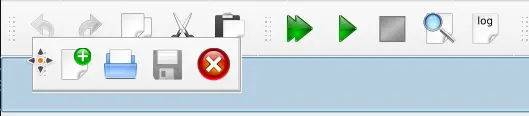
The toolbars can be hidden by a right click anywhere on the toolbar area.
They can be moved by dragging the handler on the left-hand side.
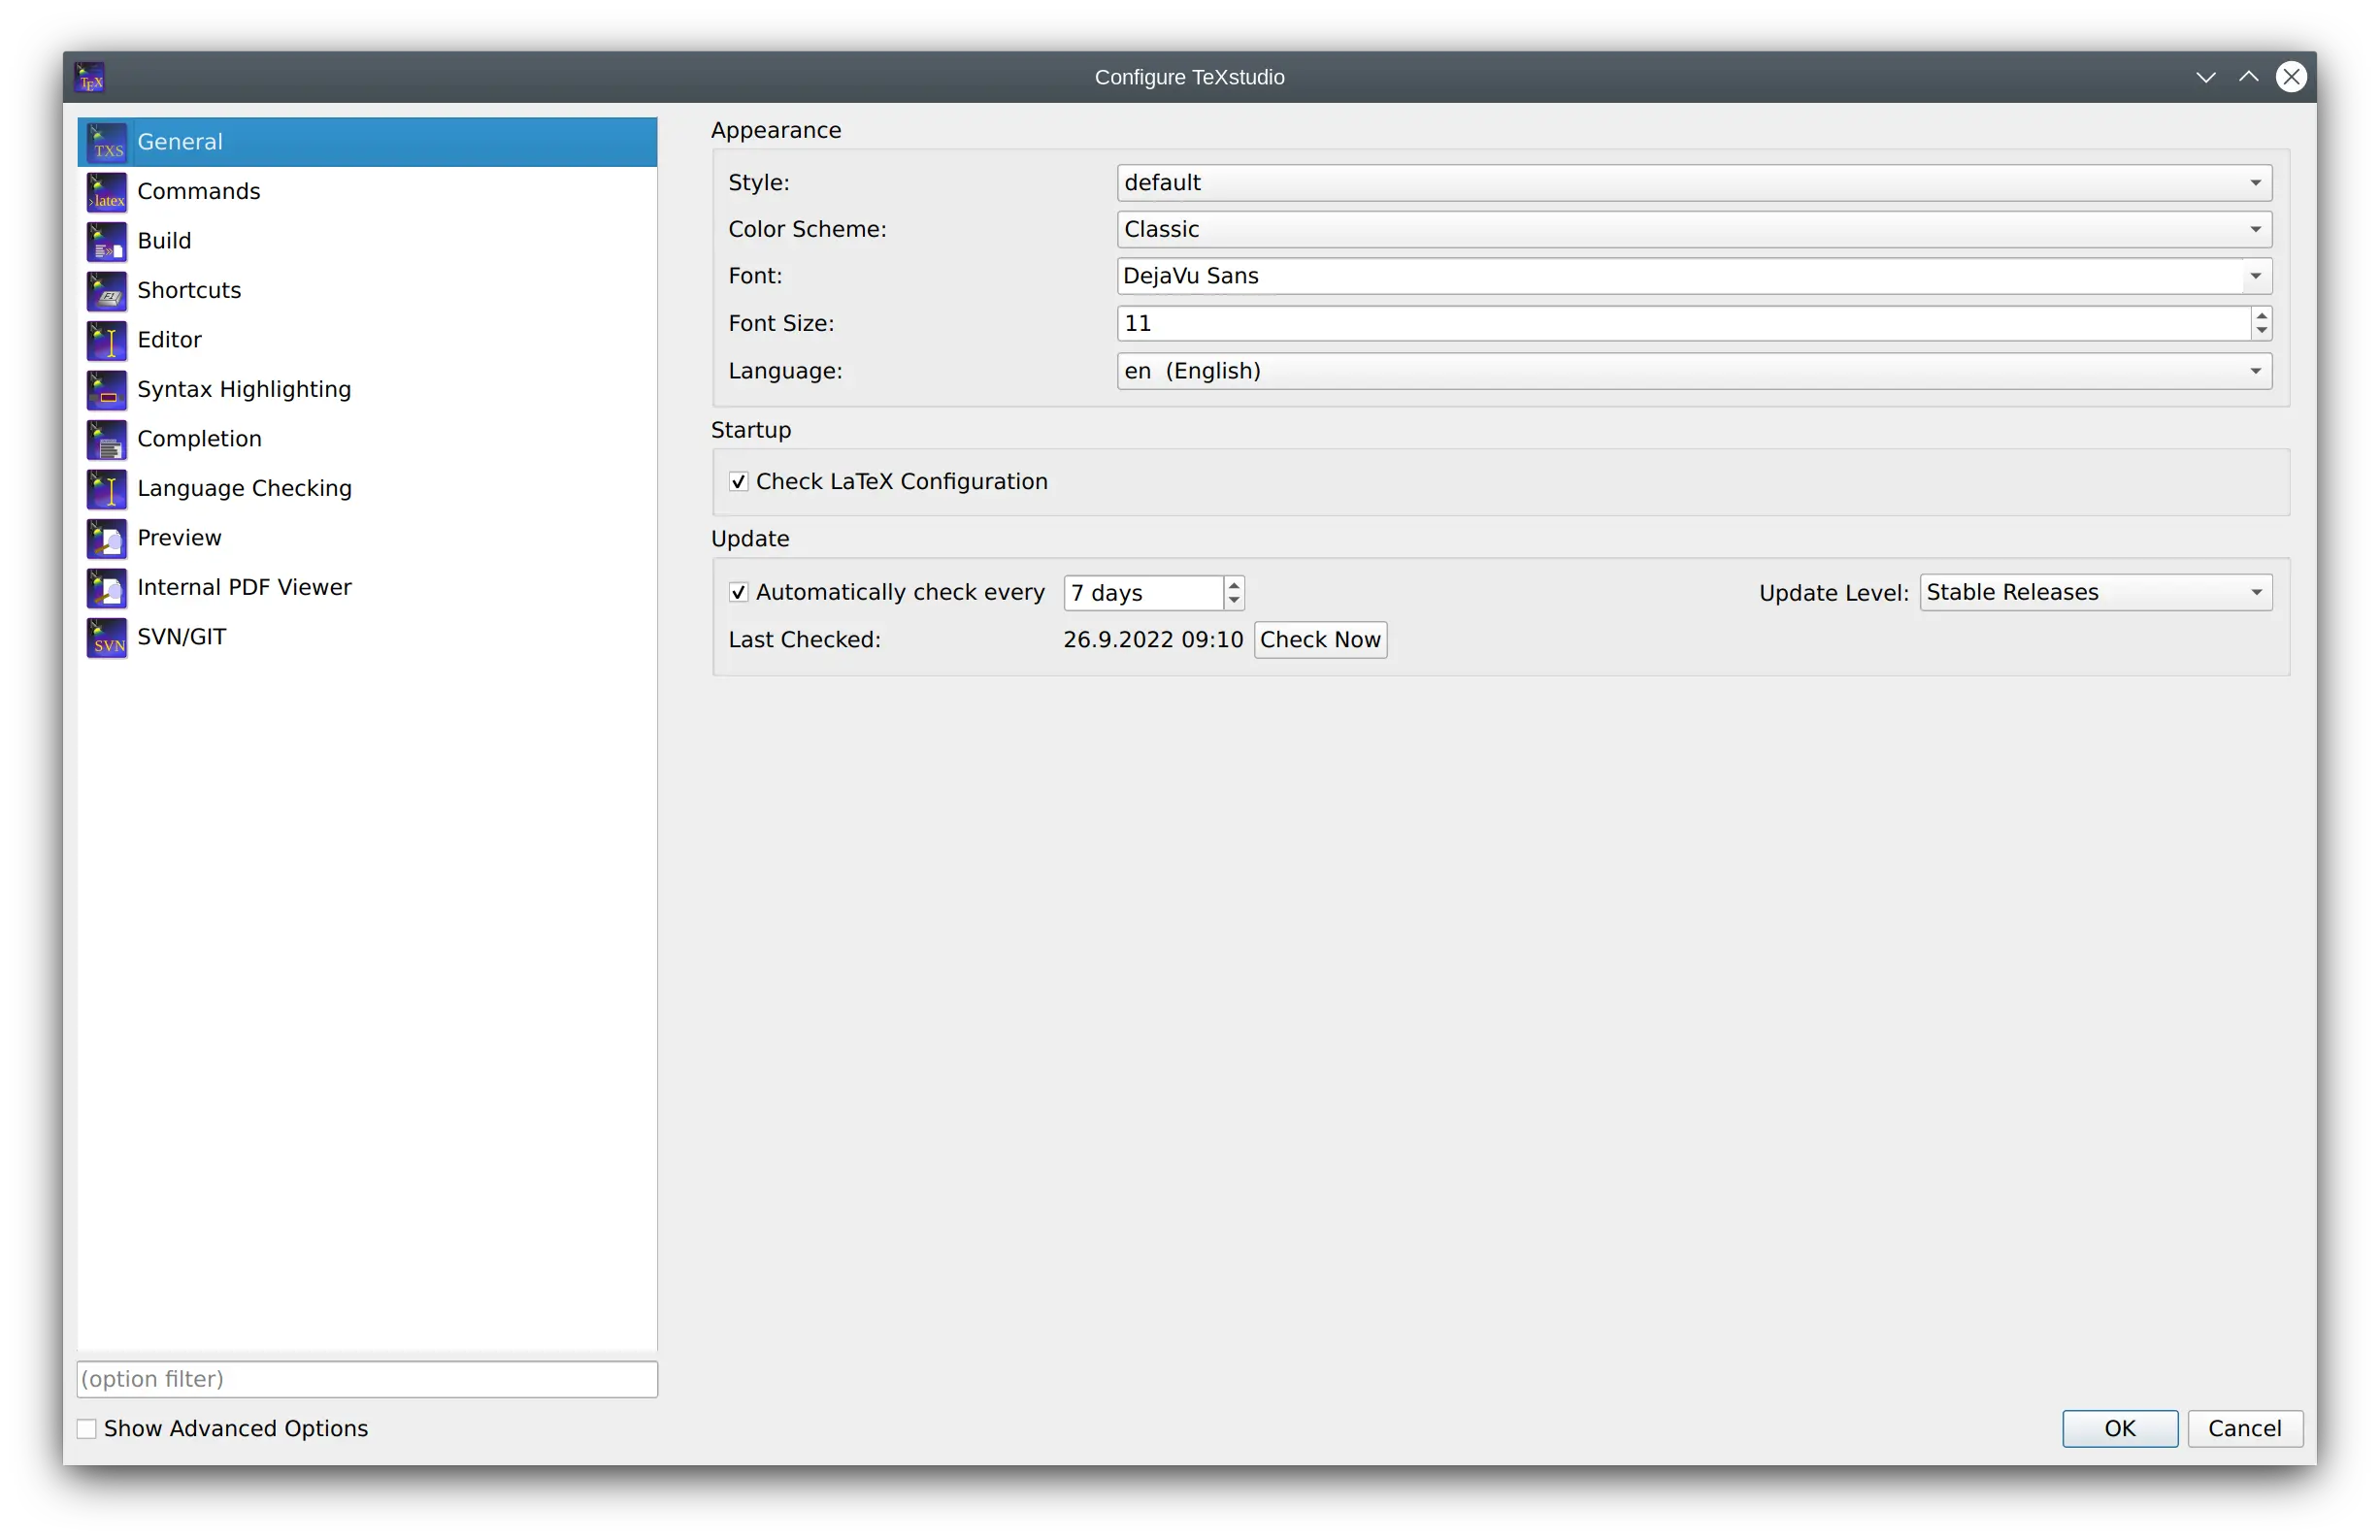
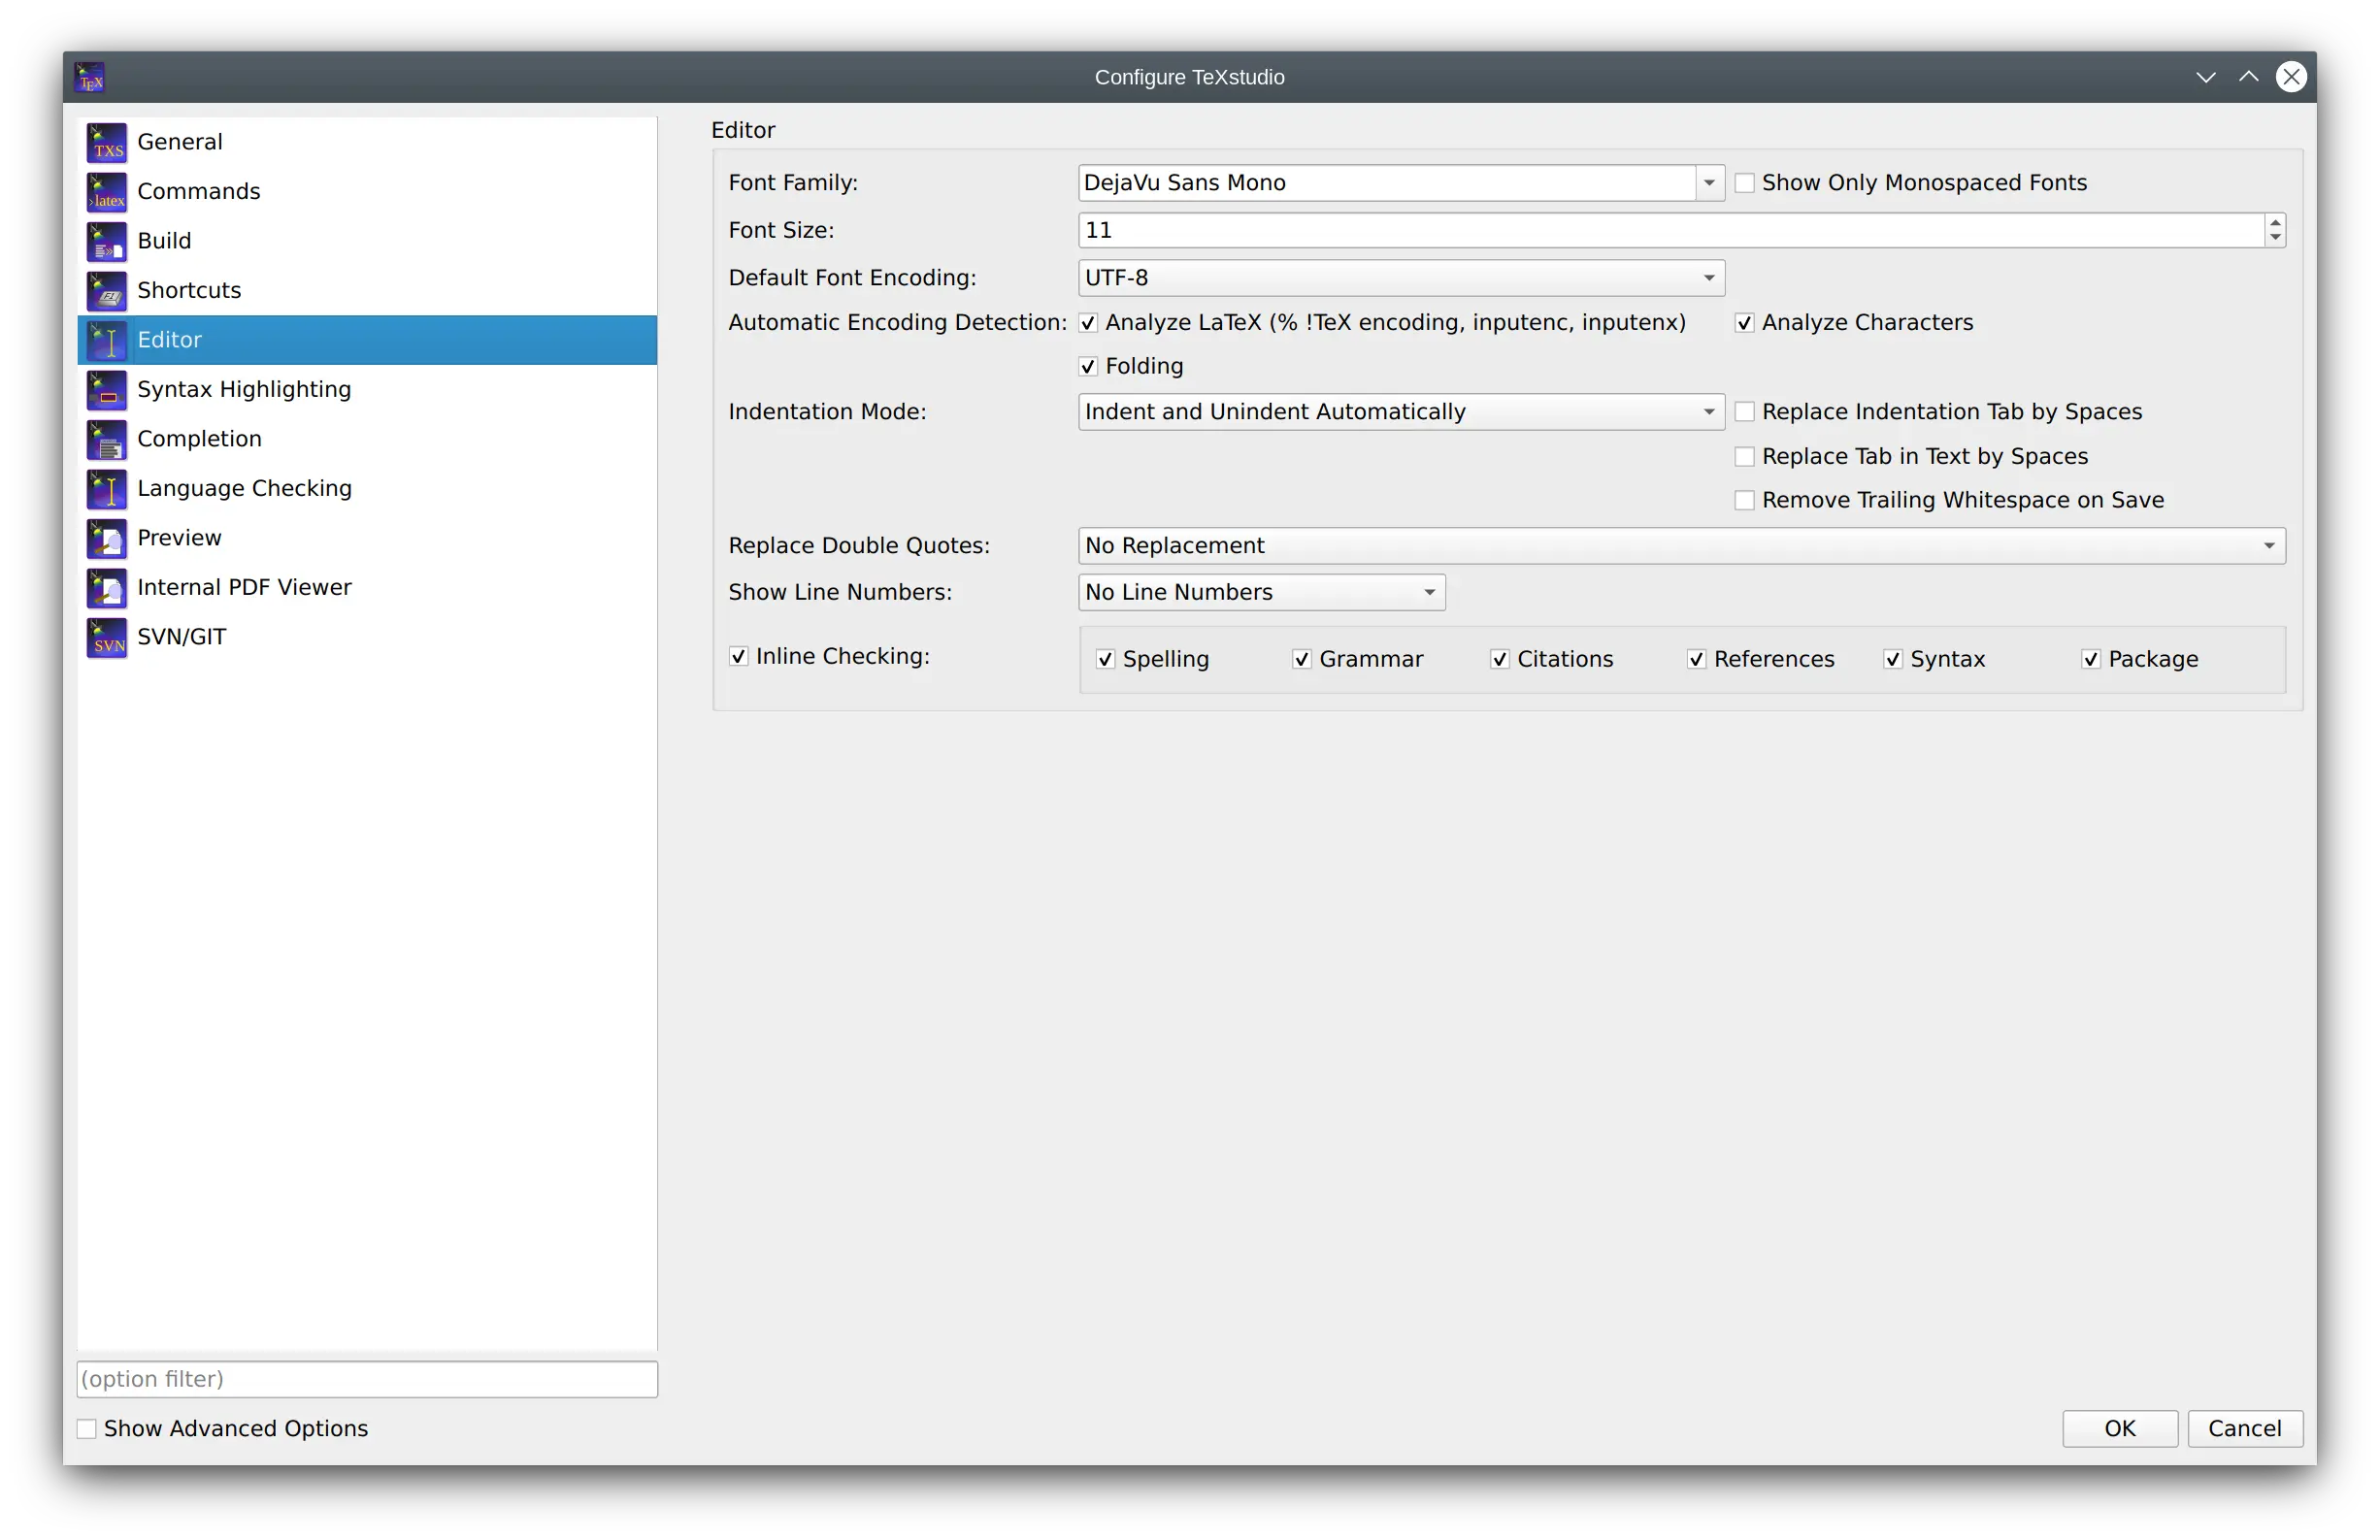
This panel allows the setting of some general aspects.
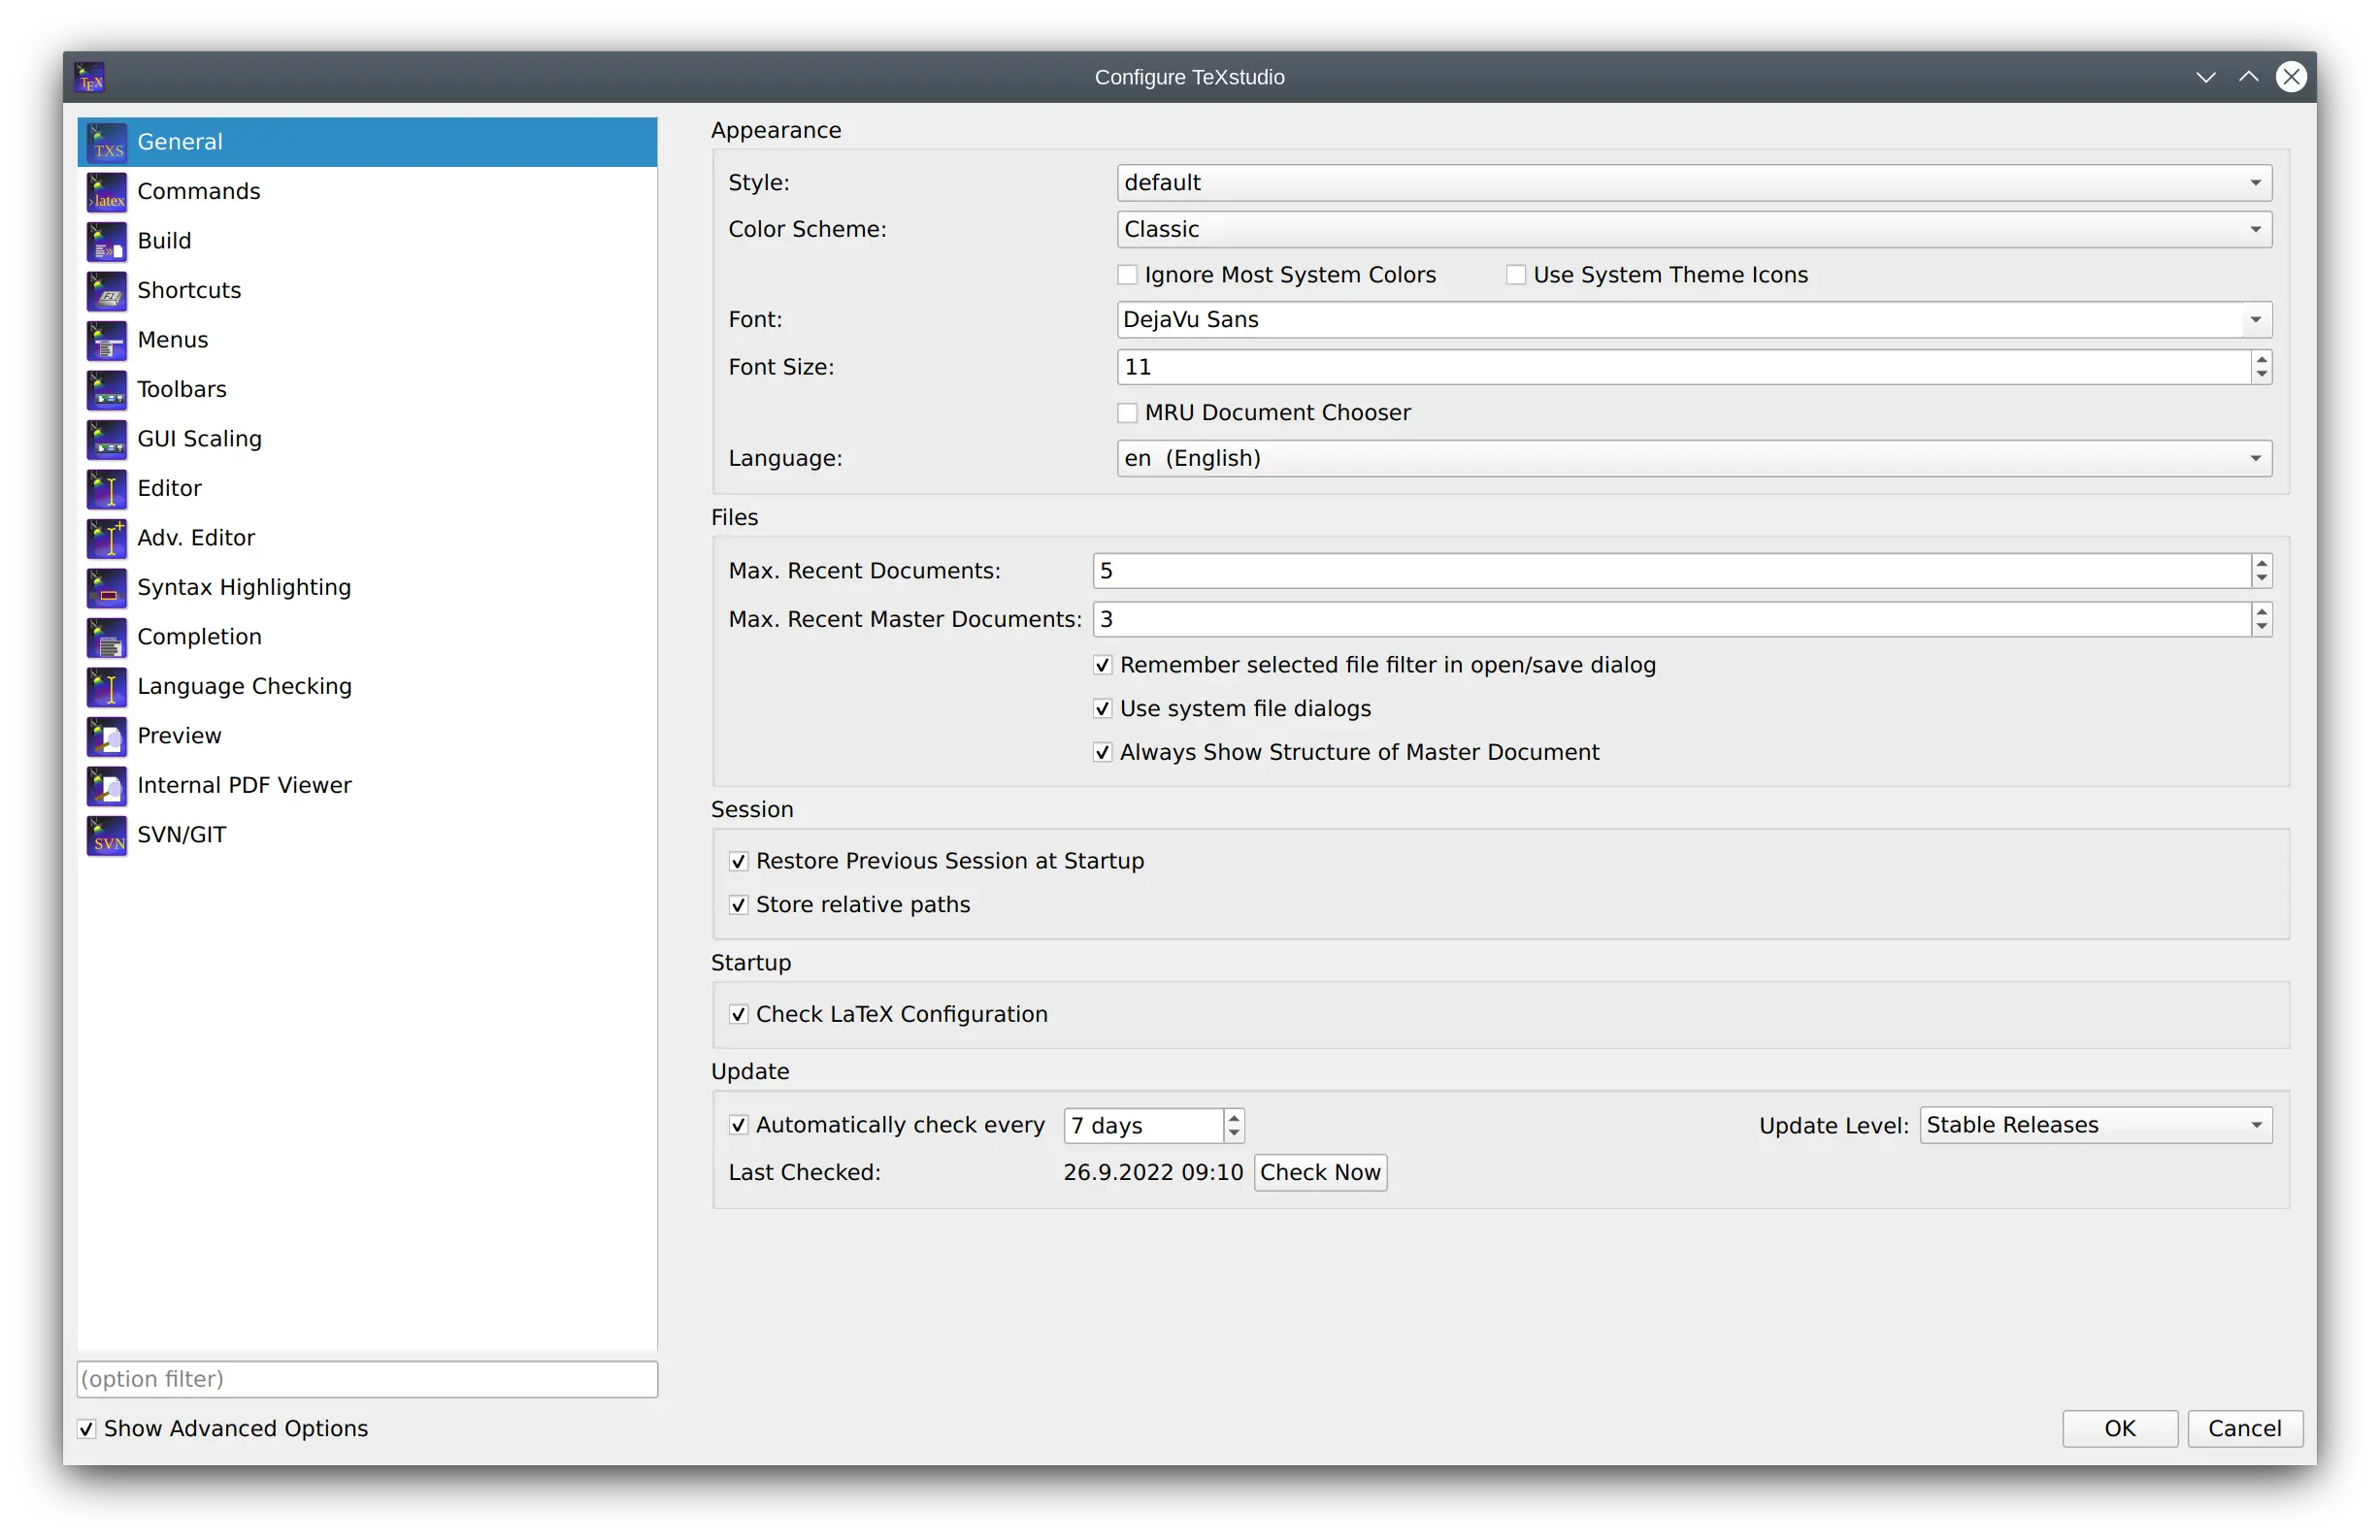
The advanced options allow:
You may change the default encoding for new files (“Configure TeXstudio” -> “Editor” -> “Editor Font Encoding”) if you don’t want utf8 as encoding. Don’t forget to set the same encoding in the preamble of your documents. (e.g. \usepackage[utf8] , if you use utf-8).
TeXstudio can auto detect utf-8 and latin1 encoded files, but if you use a different encoding in your existing documents you have to specify it in the configuration dialog before opening them. (and then you also have to disable the auto detection)
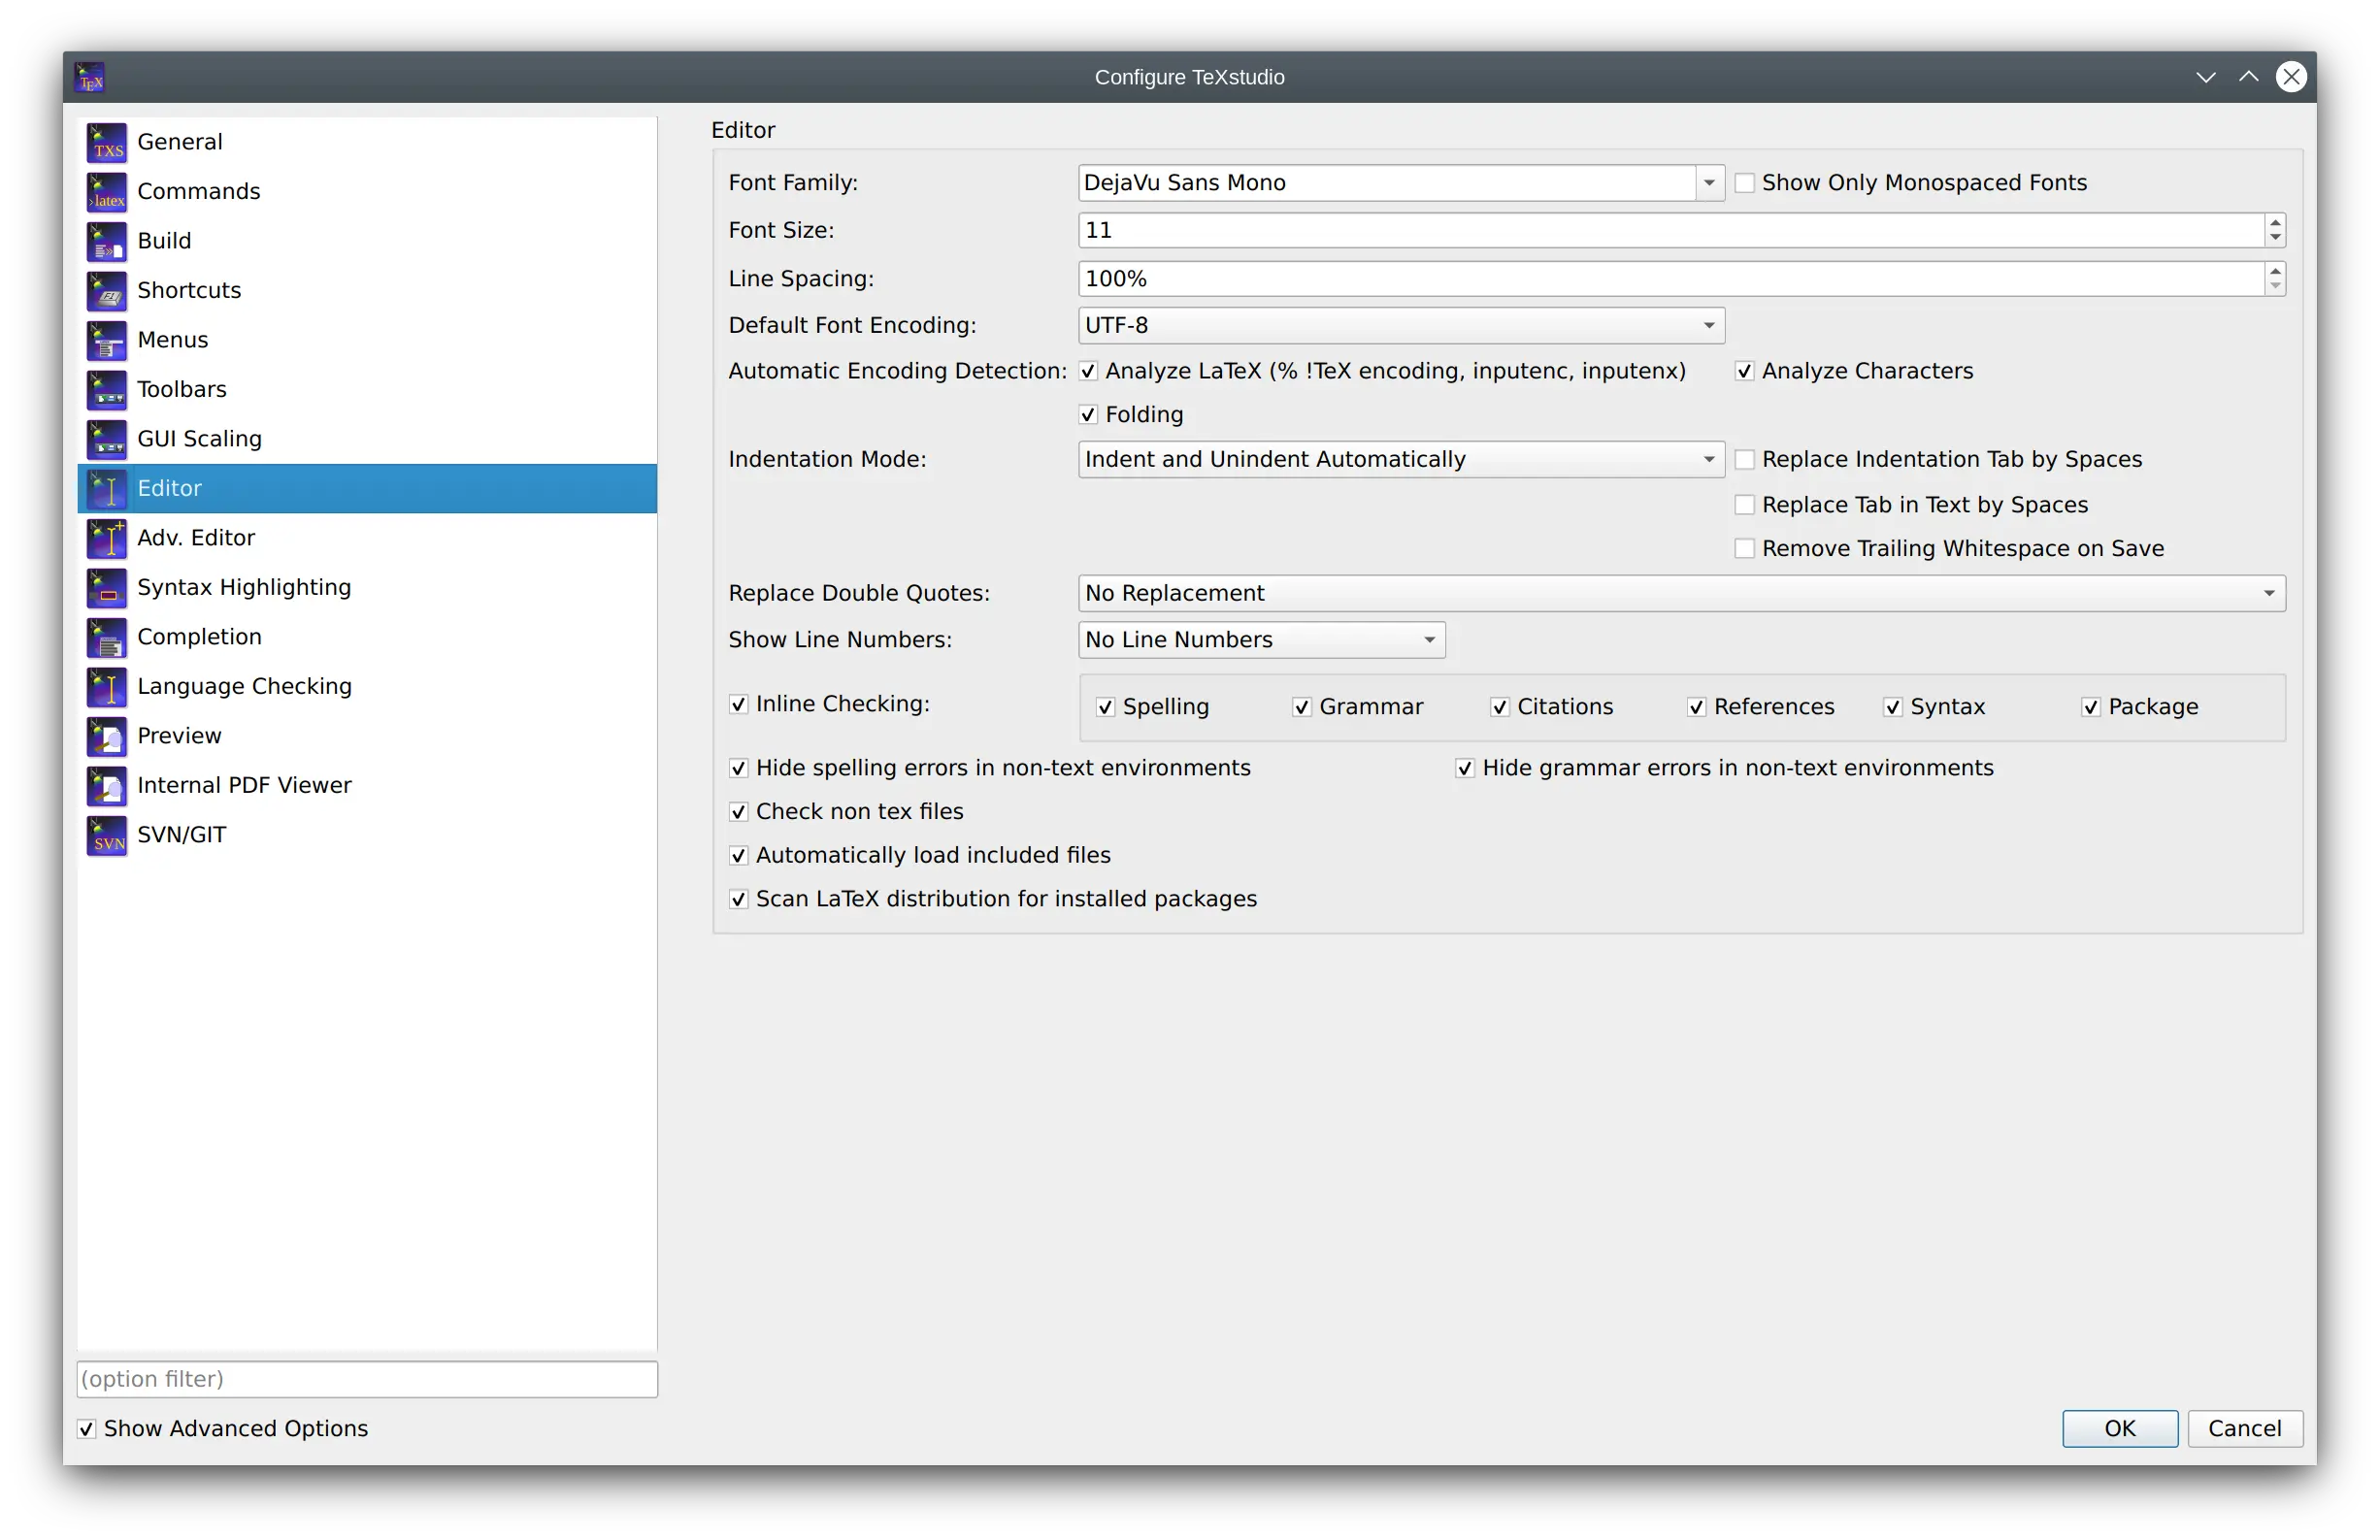
The advanced options allow among others:
Automatically load all included files of a LaTeX document
This load all child document and scans them. This is necessary to provide a complete set of available references, bibID and possibly used packages if they are defined in a child document
Scan LaTeX distribution for installed packages
This scan allows txs to determine if the given packages are valid and also to provide proposal for package name completion
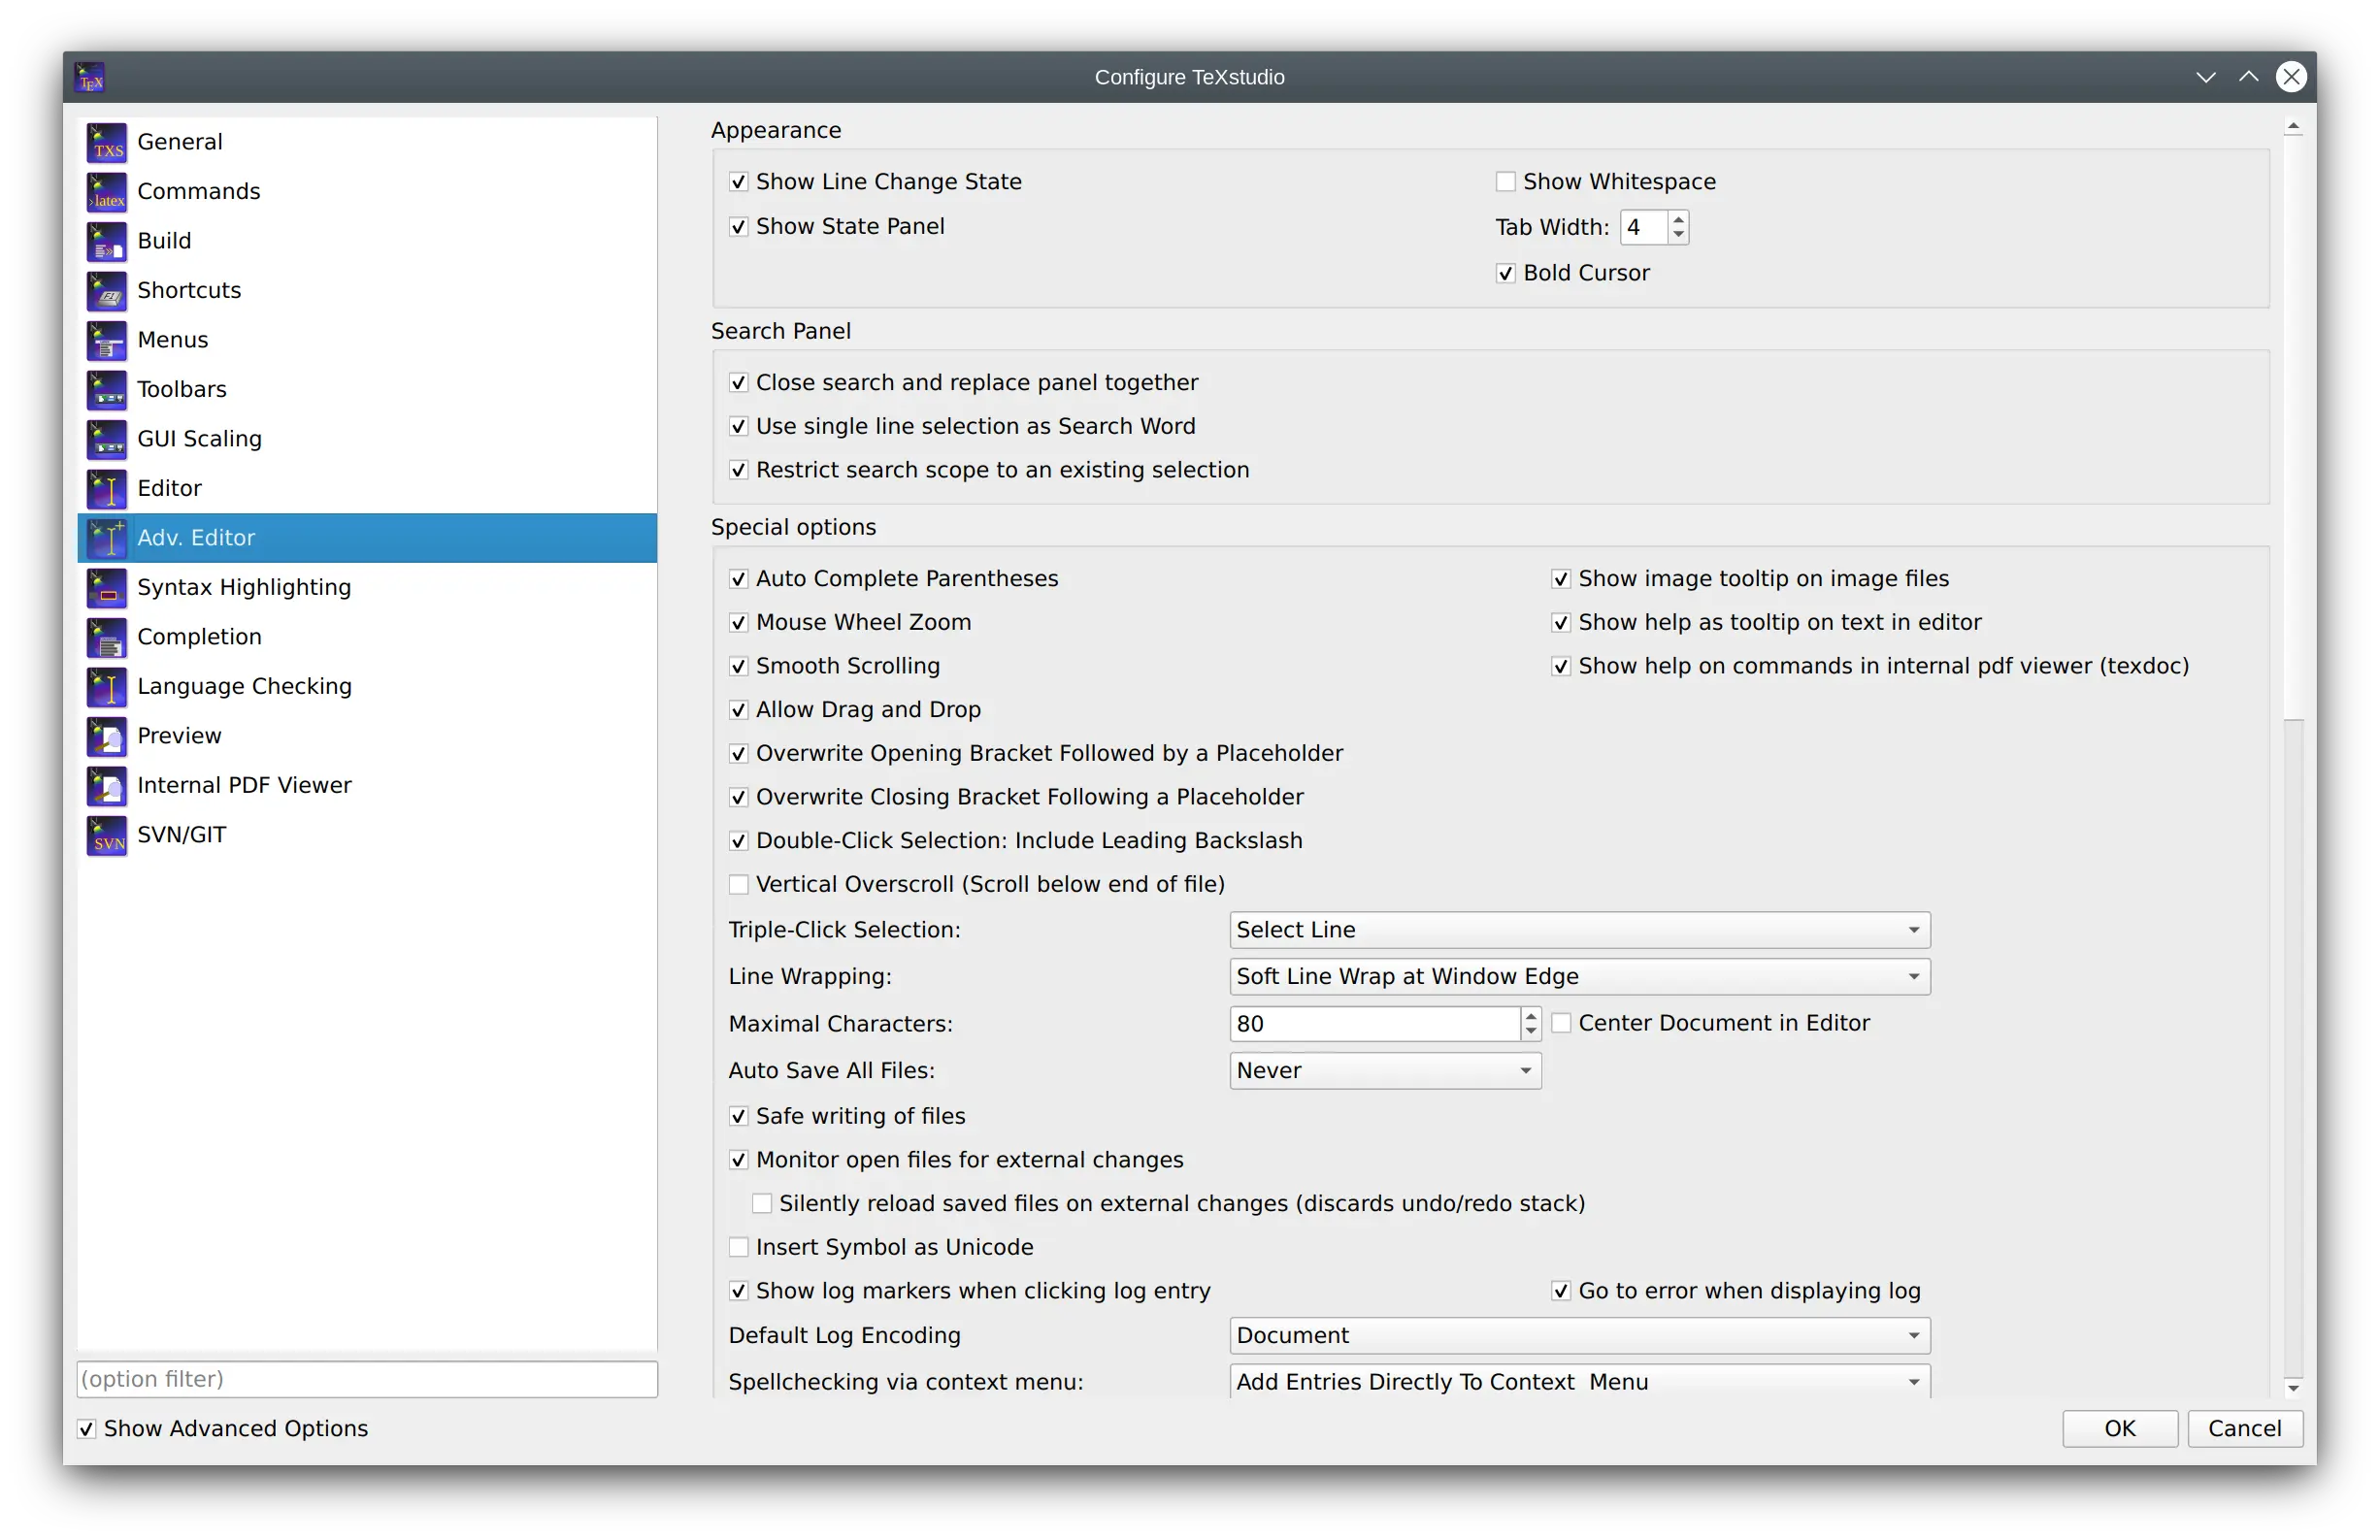
The advanced editor option allow fine control over many different aspects. The overview here is incomplete and concentrates on commonly used changes.
Show image tooltip on images in files
when hovering over an image filename (e.g. in a \includegraphics command), a tooltip with the graphics content is shown
Show help as tooltip on text in editor
when hovering over a LaTeX command in the editor, txs can show a tooltip on that command if it is described in some latex command reference.
This allows to change the line wrapping mechanism. By default all lines are wrapped at the window edge. They can also be wrapped after a defined number of characters which is not always the same horizontal width if the characters are not monospaced. Or hard line wrapping after a number of characters can be selected. This inserts a new line when the number of characters exceeds a defined values. This insertion is done when saving a document and only for changed lines.
Auto save all files
txs allows to automatically save all files every few minutes
The section for the structure panel offers:
Reference command in context menu
use this command when inserting a reference with command from a context menu
Regular expression for TODO comment
define what comment is considered as TODO comment (which are highlighted and collected specifically )
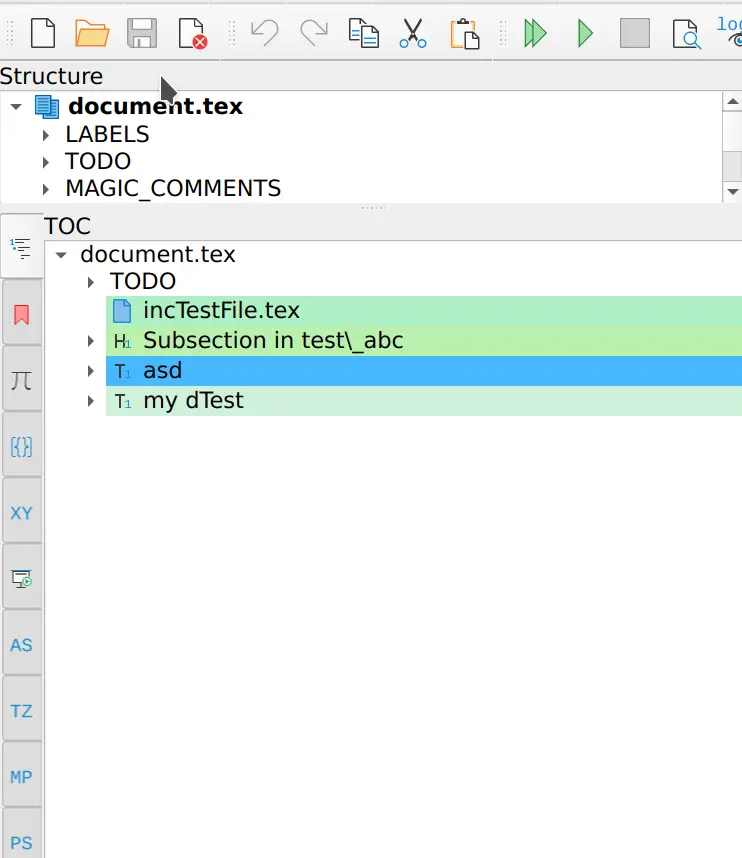
Use color in global TOC
The global TOC can use colored background to distinguish between different included files. Different color schemes and no color are possible.

The table autoformatting affects the manipulate table tools .
Are special commands which do not add cell content and need to handled specially, e.g. \hline at the end of a row.
Special commands position
where to place them when reformatting a table.
One line per cell
when reformatting a table, just put each cell in an individual line

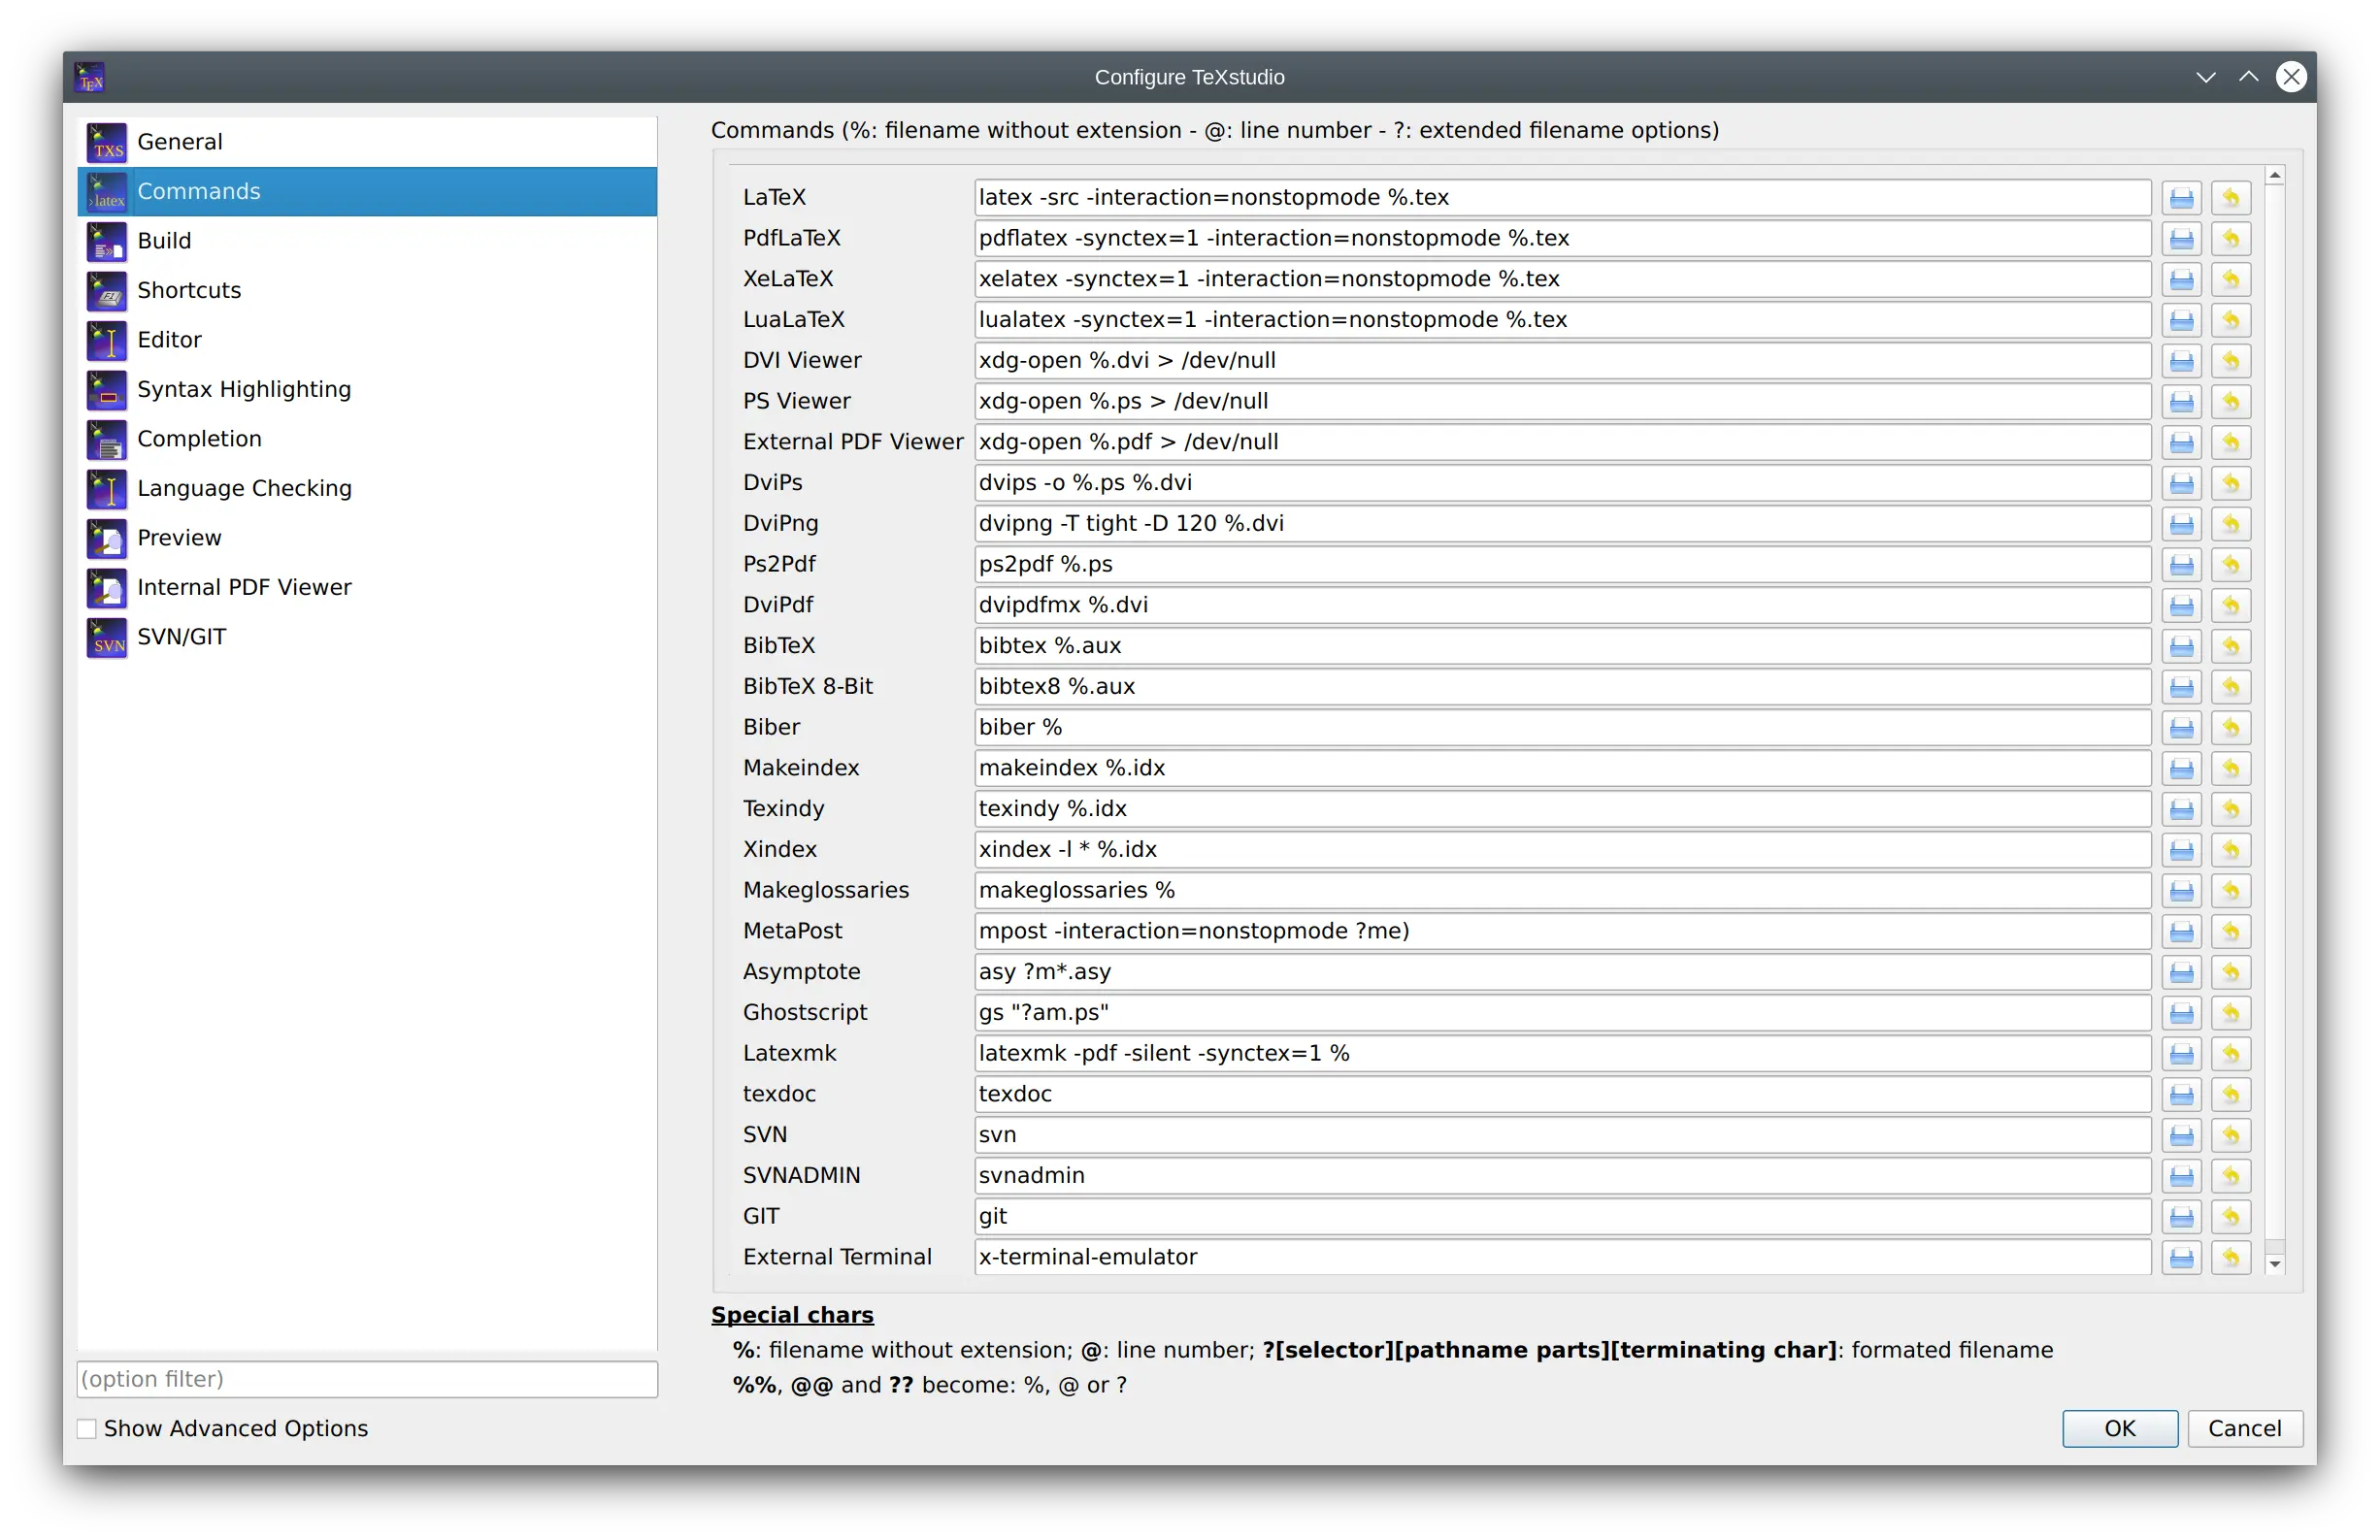
LaTeX comes with a number of command line tools to compile and manipulate LaTeX documents. The commands section defines there location and arguments.
The default settings should work with the recent and standard LaTeX distributions, but you could have to modify them (“Configure TeXstudio” -> “Commands”). To change a command, just click on the button at the end of the corresponding line and select the command in the file browser : TeXstudio will automatically adapt the syntax of the command.
You can use a number of special characters / character sequences to address the context of the current document. They are expanded at runtime:
filename of the root document for of current document without extension
current line number
? followed by further characters
See the instruction at the bottom of the configuration dialog.
Location of the TeXstudio executable (useful for portable settings)
Location of the settings file (texstudio.ini)
You can always restore the original settings using the revert button to the right.
Before an external command is executed the command line undergoes expansion where the following tokens are recognized and replaced by TeXstudio:
Some viewers can jump to (and visually highlight) a position in the DVI/PDF file that corresponds to a certain line number in the (La)TeX source file. To enable this forward search, you can enter the command line of the corresponding viewer either as command line for an user tool in the User menu (User/User Commands/Edit…) or in the viewer command line in the config dialog (“Options/Configure TeXstudio” -> “Commands”). When the viewer is launched, the @-placeholder will be replaced by the current line number and ?c:ame by the complete absolute filename of the current file. If your PDF file is not in the same directory as your .tex file you can use the ?p:ame placeholder. For details see External Commands .
On Windows, you can execute DDE commands by inserting a command of the form: dde:///service/control/[commands. ] or dde:///programpath:service/control/[commands. ] to start the program if necessary.
Below you can find a list of commands for some common viewers. Of course, you have to replace (your program path) with the path of the program on your computer, if you want to use a command.
"(your sumatra path)" -reuse-instance -inverse-search "\"*(your TeXstudio path)*\" \"%%f\" -line %%l" "?am.pdf"
Jump to a line in a running Sumatra (Windows only):
Launch Sumatra if it is not running and jump to a line in it (Windows only)
dde:///(your sumatra path):SUMATRA/control/[ForwardSearch("?am.pdf","?c:am.tex",@,0,0,1)]
Launch TeXstudio from Sumatra
"(your TeXstudio path)" "%f" -line %l
A possible value for (your Sumatra path) is C:\Program Files\SumatraPDF\SumatraPDF.exe
"(your Reader path)" "?am.pdf"
"*(your Reader path)*" "?am.pdf"
Navigation and closing are achieved via DDE commands. Since version 10 of the adobe products the DDE service name contains a letter for the Product and the version number.